
Usually, I prefer to pick less commonly discussed topics for this blog. But l was asked about saving games in Unity quite a lot, and I decided to write about it. It will be a beginner-oriented tutorial, so don’t expect fancy programming tricks or a complicated system design.
First of all keep in mind that there is no single correct way to do it. Every game is different, and has different needs. Second, you can’t just save everything (unless you want to save a few gigabytes of data from the ram). You have to pick and choose the data you want to save, like the level number, checkpoint id, player health etc. Same goes for loading. You will have to think about how you will use the saved data for loading.
Let’s assume we have a player class with two fields, and two methods for saving: playerName, playerHealth, SaveData(), and LoadData()
using UnityEngine;
public class Player : MonoBehaviour
{
public string playerName = "Assign a name in the inspector";
public float playerHealth = 100f;
private void Start()
{
// Load the data when the game starts
LoadData();
}
private void OnDisable()
{
// Save the data when the game stops
SaveData();
}
private void SaveData()
{
// Will save playerName and _playerHealth
}
private void LoadData()
{
// Will load playerName and _playerHealth
}
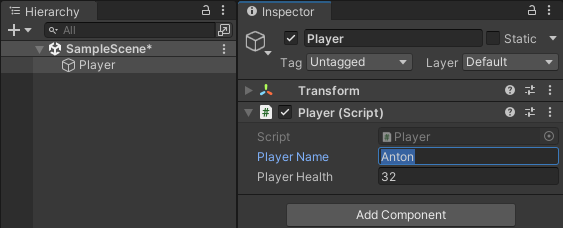
}Assign this script to a game object in the scene, and change the name to whatever you like in the inspector.
PlayerPrefs
If you are using Unity, most likely this is the first save method you would learn. Saving the data looks something like this:
private void SaveData()
{
	// Save player name
	PlayerPrefs.SetString("playerName", playerName);

	// Save player health
	PlayerPrefs.SetFloat("playerHealth", playerHealth);

	// Make sure to call this to actually save the data
	PlayerPrefs.Save();
}
And loading like this:
private void LoadData()
{
	// Check if player name was saved
	if (PlayerPrefs.HasKey("playerName"))
	{
		// Load player name
		playerName = PlayerPrefs.GetString("playerName");
	}

	// Check if player health was saved
	if (PlayerPrefs.HasKey("playerHealth"))
	{
		// Load player health
		playerHealth = PlayerPrefs.GetFloat("playerHealth");
	}
}
Start the game, change the playerName, and playerHealth in the editor, and stop the game. Next time you start it you will see that the name was loaded.
This method works, and it can be useful for a few strings and values. But it is can get really tedious if you have a lot of data. You can only save strings, integers, and float. Also on Windows, this data goes to the registry, and I don’t think it’s a good idea to clutter the system database if we can avoid it. Also, there is no easy way to edit it outside of the editor.
Creating your own save files
So what are the alternatives? Create our own save files, of course! Don’t worry there is nothing scary about it. All we have to do is to convert our data to a string and write the it to a text file using a C# method. Since playerName is already a string let’s start with that.
private void SaveData()
{
	// Application.persistentDataPath is a specific folder for your game.
	// More info: https://docs.unity3d.com/2021.3/Documentation/ScriptReference/Application-persistentDataPath.html
	string savePath = $"{Application.persistentDataPath}/Save.txt";
	System.IO.File.WriteAllText(savePath, playerName);
}

private void LoadData()
{
	string savePath = $"{Application.persistentDataPath}/Save.txt";

	// Check if the file exists
	if (System.IO.File.Exists(savePath))
	{
		// Read the file
		playerName = System.IO.File.ReadAllText(savePath);
	}
}
Application.persistentDataPath is a special folder for your application or game on the device. It changes depending on the system. Check the documentation to find where yours is. You can replace savePath with any path you wish, of course. If you go to that folder you will see Save.txt file in there. And yes, you can open it up with a regular text editor and edit it.
And what about health? Do we create a separate file for each variable, like Save_playerName.txt, and Save_playerHealth.txt? That is certainly an option, albeit not a very good one. The best way would be to write all of our data into a single file.
Creating such a file is actually quite easy. All we have to do is to create a single string with all of our data:
private void SaveData()
{
	string data = playerName + "," + playerHealth.ToString();

	string savePath = $"{Application.persistentDataPath}/Save.txt";
	System.IO.File.WriteAllText(savePath, data);
}
Now the data string and the Save.txt file will look like this:
Anton,32
Before we proceed, let’s refactor that data creation line a little.
string data = $"{playerName},{playerHealth.ToString()}";That’s better! Trust me, it really is. Check out the documentation if you are curious about it.
So what about loading? Before we proceed you can run the game in this state. You will realize that the playerName field loads both the name and the health. This is an expected result because we are reading the whole text file, and assigning it’s contents to playerName. Here comes the complicated part!
Parsing the data
What we have to do is to take the contents of the file, split it into two parts (name and health), and assign each part to its relative field. Luckily we have a very handy method for splitting a string: string.Split()! Here is how it works:
// Read the file
string text = System.IO.File.ReadAllText(savePath);
// Split the data
string[] dataParts = text.Split(",");
// Assign variables
playerName = dataParts[0];
As you can see the Split(“,”) method split the string from the comma, and gave us an array of strings. You can use any character or string instead of a comma to split a string. For more detailed information on the Split() method check out the documentation.
Since we know that the name is before the comma in the save file we can assume the first element of the array will be the name. The second one will be the health, of course. Assigning a name is easy since it’s a string, and we already have a string. But health is of type float. Once again, another C# method comes to rescue: float.Parse().
playerHealth = float.Parse(dataParts[1]);
There are similar methods to float.Parse(), like int.Parse(), double.Parse() etc. They all work pretty much in the same way.
And that’s all there is to it! Now we have our own save file! We can save and load any kind of data we want! Here is what our final script looks like:
using UnityEngine;

public class Player : MonoBehaviour
{
	public string playerName = "Assign a name in the inspector";
	public float playerHealth = 100f;

	private void Start()
	{
		// Load the data when the game starts
		LoadData();
	}

	private void OnDisable()
	{
		// Save the data when the game stops
		SaveData();
	}

    private void SaveData()
    {
        var data = $"{playerName},{playerHealth.ToString()}";

        var savePath = $"{Application.persistentDataPath}/Save.txt";
        System.IO.File.WriteAllText(savePath, data);
    }

	private void LoadData()
	{
		var savePath = $"{Application.persistentDataPath}/Save.txt";

		// Check if the file exists
		if (System.IO.File.Exists(savePath))
		{
			// Read the file
			var text = System.IO.File.ReadAllText(savePath);
			// Split the data
			var dataParts = text.Split(',');
			// Assign variables
			playerName = dataParts[0];
			playerHealth = float.Parse(dataParts[1]);
		}
	}
}
And here is another tip for you: The extensions at the end of files don’t mean much by themselves. They are just helpful hints about the file types. So we can get rid of it, or come up with a completely unique file extension! Instead of Save.txt, we can have Save.mag (mag stands for My Awesome Game!). It’s completely up to you.
While this approach is the basis for data saving in Unity, it can get very tedious, very fast. Imagine you have Lots of different variables, lists, and other fancy data types. It would be extremely hard to read and parse it all manually. Thankfully there are a bunch of methods to help us with it. And I will talk about them in the second part!
One thought to “Save System (Part 1)”
Comments are closed.